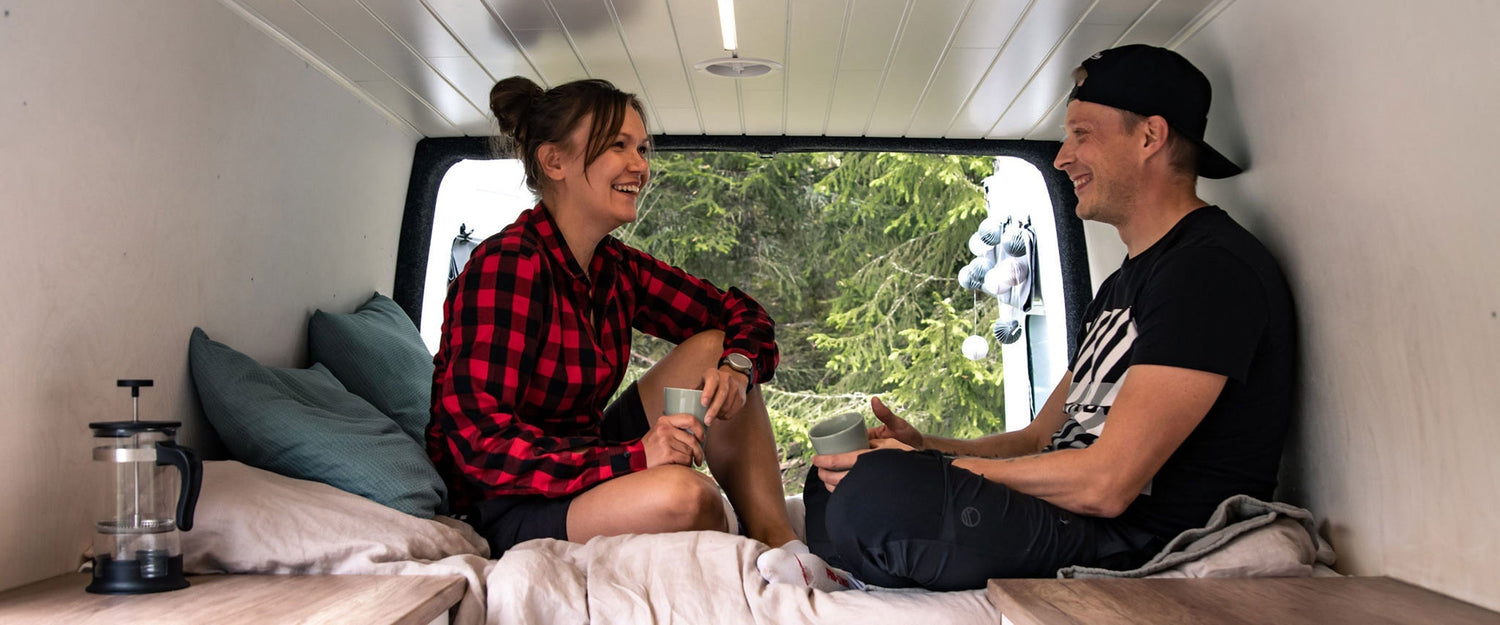
Vanlife has become increasingly popular. The freedom to travel and spend more time outdoors appeals to many, and some have even moved into a camper van or a self-built van. Teemu and Kirsi from VanlifeFinland built their own camper van, "Paku," from a standard van. They share how the project progressed and what to consider when building your own camper van.
From the idea to a finished self-made camper van. It's the year 2020, and COVID-19 has eased a bit for the summer. We are traveling by car on Senja Island in Northern Norway, at Ersfjord Beach. While preparing breakfast, our attention is drawn to a van on the beach with its side and rear doors open. It carries mountain bikes and surfboards, and a plywood bed with a mattress has been built in the back. Outside the van, a couple of friends are making their breakfast. The van's interior is quite rough, but it sparked our interest. Could this way of traveling be possible for us? The idea of this travel method and the opportunities it brings became clearer. Until now, we had only seen similar vans on social media, mainly from the United States.
The idea of having our own camper van especially intrigued Kirsi. Teemu was initially somewhat skeptical about building a camper van. We had no experience or idea about building one. However, during the fall, we were inspired by vanlife photos on Instagram and the freedom that having our own camper van would bring.
Eventually, the decision to get a camper van became relevant, and the search for the right vehicle began. The search took six months. We test-drove two vans, but they didn't feel right. The third one looked better on paper, and the test drive felt perfect. A 2007 Ford Transit became ours, and Kirsi's car was left at the dealership.
Progress of the building project:
- Removing, repairing, and cleaning the rear walls and floor
- Soundproofing
- Removing the old partition
- Planning the layout
- Building the floor
- Installing ventilation
- Insulating the walls and ceiling
- Framing the walls and ceiling
- Installing the electrical wiring
- Constructing the walls
- Designing and installing the partition
- Building the roof
- Consulting with an inspection officer
- Building the bed
- Installing the cabinets
- Connecting the electrical systems
- Installing the water system
- What did it all cost?
- The final result
Removing, Repairing, and Cleaning the Rear Walls and Floor
We bought the camper van in February 2021. It was the middle of winter, so we needed to find a garage where we could examine the van in detail and start the project. Eventually, we found a suitable garage. The first step was to remove the plywood panels attached to the walls in the rear of the van. This was an easy task! We simply unscrewed the panels and took them out. Underneath, we found some minor surface rust, which we sanded off with a grinder and covered with rust-preventive paint.
Removing the floor was a bigger project. The floor surface was covered with a plastic mat, which came off relatively easily with some force. Underneath the plastic mat was a thick cardboard-like material, which was slightly soft in a few spots.
The cardboard came off in small pieces, but once we had removed everything, we noticed a bit more rust in a few areas of the floor. We were able to grind this off, but the right-side wheel arch was rusted through. We had a metalworker repair the wheel arch. Fortunately, we found a skilled metalworker, and within a couple of days, the wheel arch was as good as new.
Soundproofing
Initially, we worked on the camper van project rather slowly, a few times a month. In the spring, we were able to do the soundproofing outside. We cleaned the rear of the van thoroughly and sanded off even the smallest rust spots. It was reassuring to start the construction knowing that the foundation was in good condition.
We sealed all the extra holes with Sikaflex sealant. Then, we applied soundproofing mats to the walls and ceiling to reduce the noise coming from outside the van.
Removing the Old Partition
Between the cab and the rear was a metal partition. While suitable for a cargo van, it was too harsh for a living space, so we decided to remove it. We grabbed a drill and unscrewed the partition.
Removing the partition was relatively easy, and it significantly changed the feel of the van. At this point, we had no idea what kind of partition, if any, would replace it. The inspection officer ended up making that decision for us, but more on that later.
Layout Planning
At this stage, we began to concretely plan the layout for the rear of the camper van. We measured the width and length of the rear space and sketched out potential layouts on paper.
The planning started with identifying what we would need to take on our trips. We also taped the layout directly onto the floor to get a real-life sense of how much space each structure would occupy. Ultimately, the layout changed about three to four times before we settled on the final design.
Building the Floor
Yay, the first concrete construction phase! We built the floor framing using 2x2 timber, which we glued to the floor with adhesive sealant to avoid drilling extra holes.
We placed 50 mm Finnfoam insulation boards between the frames. The spaces between the frames were cut to fit the Finnfoam. We only had to cut small pieces of the insulation for the edges. The floor itself was made of plywood, topped with vinyl flooring.
Ventilation
One of the most important features in a camper van is ventilation. While many RVs and camper vans have a roof vent, we decided to install a solar-powered fan in our camper van. The fan charges itself and allows air to circulate in or out at two different speeds.
This was a pretty nerve-wracking step since it involved cutting a hole in the roof, but it went well in the end. We traced the outline of the fan on the roof and drilled a starter hole with a power drill. Using a jigsaw, we cut along the drawn line to create the large hole. After finishing the cut, we sanded the edges of the hole to make them smooth and fitted the fan into place. The fan was secured to the roof with three screws, and we applied sealant around the edges to ensure no water could leak inside.
We also made a ventilation grille for the passenger window, which we use at night. We slightly open the window, place the grille in the gap, and then close the window onto the grille. This allows air to circulate through both the grille and the fan. This solution has worked well, and the air circulation inside has been excellent.
Insulating the Walls and Ceiling
Insulating the walls and ceiling was one of the most challenging stages of the camper van project. We spent a lot of time researching on YouTube and Googling how to properly insulate a camper van. In 2021, there weren't many Finnish videos or information on the topic, but we did find some useful tips from the few that were available. Foreign videos and websites weren't much help, as they typically don't need as much insulation as we do in the North.
Initially, we planned to place small frames between the Finnfoam insulation boards to secure them. However, after struggling with this idea for an evening, we realized it wasn't working. In the end, we glued the 50 mm Finnfoam boards directly to the walls with urethane foam. This process took about two evenings, after which we could start insulating the ceiling.
We used 30 mm Finnfoam for the ceiling, attaching it with adhesive sealant. The Finnfoam was supported with 2x2 timber, as shown in the picture.
The easiest method would have likely been to use Armaflex closed-cell foam insulation for the entire van, as it can simply be glued to the walls and ceiling. However, due to its high cost, we opted for Finnfoam. We did purchase small amounts of Armaflex to insulate the more difficult areas, such as the hat shelf and curved sections. In the picture, you can see that the junction between the wall and ceiling is insulated with Armaflex.
Over the insulation, we applied aluminum foil, sealing the seams with aluminum tape. This helps keep moisture out of the walls and insulation. The same material is commonly used in sauna walls.
Framing the Walls and Ceiling
For the framing, we used approximately 1.5 cm thick slats, which allowed the framing to bend along the van's contours and gave the walls an attractive curve. The frames were attached to the van’s structural beams with self-drilling screws. At this stage, we also had to consider the mounting points for the bed and cabinets, so we added horizontal supports at appropriate heights to secure the bed and cabinet frames properly.
We wanted the electrical wires hidden within the walls, so at this point, we pre-ran the wires for the ceiling light and light switch. Some electrical wires were installed after the walls were finished, but these could be easily concealed within the cabinets.
Constructing the Walls
For the wall material, we chose birch plywood, and the walls were coated with Osmo Color Matt Aluminium wood wax. We used an ombre technique during painting to achieve a gradient effect on the walls. The ombre technique involves applying wax to the surface using a cloth in a circular motion.
The upper part of the wall became lighter, while as we moved downwards, more of the wood grain remained visible. Additionally, we applied clear Osmo wax to the wall behind the sink to provide extra protection against water splashes.
Designing and Installing the Partition
Throughout the project, we visited inspection officers several times to inquire about what modifications were permissible for a camper van. The feedback on legal requirements and regulations varied significantly among different officers. However, it became clear at some point that a partition was necessary if we intended to keep the vehicle classified as a commercial van. More about our interactions with inspection officers later.
Building the partition took one weekend. We constructed it using 2x2 timber and insulated it with 50 mm Finnfoam. The partition was designed to accommodate a light switch, and wiring was routed inside the wall for this purpose. Additionally, a hole was made in the partition to route cables from the vehicle's main batteries to the auxiliary batteries in the rear.
Building the Ceiling
Constructing the interior ceiling ended up being a one-night job. We opted for MDF ceiling panels, which are resistant to moisture.
The panels were attached using concealed nailing to the ceiling framing to ensure a clean finish without visible nail marks. The most time-consuming aspect was cutting openings in the panels for the solar-powered fan and LED ceiling light strip.
Negotiating with the Inspection Officer
As mentioned earlier, we visited several inspection officers to inquire about what modifications were permissible if we wanted to maintain the van's classification as a commercial vehicle. We also read many experiences online, but the comments and experiences varied so much that we didn't gain much insight from them. We wanted to install a fixed bed and furniture, but this was a question to which no one seemed to have a clear answer.
Eventually, we found out that there was a person at a particular inspection station who was knowledgeable about the latest legal regulations regarding vehicle modifications, so we headed there with our van.
We asked the inspection officer to come to the van and explained our plan, showing a model image with a fixed bed, fixed furniture, and a couple of benches. The officer said that everything else was okay, but there couldn't be any benches or surfaces easily used for sitting. The bed also had to be high enough that it couldn't be mistaken for a sofa, but fixed furniture was acceptable. The officer also mentioned that if the 12V voltage changed to 230V, we would need documentation from an electrician and their signature for the work.
Based on these responses, it was easy to plan and build the final version of the van. We recommend always consulting an experienced inspection officer specific to your vehicle to clarify what modifications are allowed. In our case, it worked out well because the vehicle was quite old, so the model year also affects what modifications are advisable.
Building the Bed
The bed frame was constructed using 2x2 timber, and the ends were attached to the wall framing to secure the bed firmly. Additionally, several vertical support beams were added under the bed. The bed's width is 140 cm and length approximately 170 cm. We also have to sleep slightly diagonally to straighten our legs, or else they'd be slightly bent. Despite this, we've managed well even on long trips and have had good sleep.
We purchased the mattress from IKEA. We couldn't find a mattress that perfectly fit the bed frame dimensions, so we had to cut a piece off the mattress to make it fit.
Installing the Cabinets
The cabinet frames were made from 2x2 timber and the same slats used for the wall framing. The cabinet frames were securely attached to the wall framing using corner brackets.
We bought the cabinet doors from IKEA and custom-made the tabletops from a surplus store in Finland. Mounting the doors and hinges presented some challenges. Since we built the frames ourselves, we had to do some adjustments to ensure the hinges were in the right position and the doors opened properly. In hindsight, we've thought that it might have been easier if we had found pre-made cabinet frames in the correct size. However, by doing it this way, we got exactly what we wanted.
Under the sink in the cabinet, we have a trash bin, water tank, and greywater tank—more on these later. There's shelf space in the middle for storing food items, and on one side, there are a couple of open shelves for storing items like the Trangia stove. We don't have a fixed stove in the van; instead, we've done all our cooking on the Trangia stove, which has worked out really well.
On the other wall, there's a small cabinet housing our electrical system.
Electrical Wiring
Initially, setting up the electrical system was the most daunting task because we had little idea of what needed to be done and how to make it work. Fortunately, we found plenty of instructions online and got answers to our questions through inquiries.
First, we had to figure out the appropriate wire sizes for different purposes and the sizes of fuses needed at various points. As things gradually became clearer, Teemu managed to create an electrical diagram and received confirmation from an electrician that everything was correct. "After this, I knew I could run the wires, connect the fuses, and make the connections, so ultimately, this became the most enjoyable phase of the project," Teemu remarked.
Here's the electrical diagram depicting the cable sizes, fuse sizes, and sizes of auxiliary batteries. Perhaps an extra fuse could be added at some point, but everything has been working well with this setup. Everything else we were able to do ourselves, except for pulling the cable from the inverter to the power outlet, which the electrician did because it involved a change in voltage from 12V to 230V.
There's a separation relay between the vehicle's main battery and the auxiliary batteries. When the vehicle is running, the vehicle battery charges the auxiliary batteries. When the vehicle is off, and electricity is being used in the rear, it doesn't drain the vehicle battery—the separation relay prevents this.
We added 160W solar panels to the roof a year after the van was completed, so their connections aren't shown in this electrical diagram.
Water System
The water system was the final stage, and it was relatively straightforward once all the equipment had been procured.
Here's a list of what we have in our water system:
- 20-liter fresh water tank
- 25-liter grey water tank
- Electric water pump
- Portable camping shower
- Portable chemical toilet
The water system works as follows: when you open the water tap, the water pump starts, drawing clean water from the fresh water tank, and the sink drains into a pipe leading to the grey water tank. We've made it a habit that when the 20-liter fresh water tank is empty, we also empty the grey water tank. On our first trip, we filled the grey water tank too much, and it overflowed. Luckily, we had placed waterproof mats on the cabinet floor and also a bit on the wall for protection, so nothing catastrophic happened.
The camping shower and portable toilet are located under the bed, where they are taken out when needed. We don't have them as fixed installations. The toilet is primarily used at night, so we lift it into the sleeping area in the evening before going to bed in case we need to use it during the night. This way, we don't have to go outside during the night, and we can quickly get back to sleep.
The camping shower has been handy and has made showering easier. Just fill a bucket with water, open the back doors of the van, and use a shower curtain between them. Showering in the back of the van has been convenient. Sometimes the water has been a bit chilly if we haven't had time to heat it on the Trangia stove, but that's all part of the adventure. Year-round cold dips have helped us tolerate the cold water better.
What Did Everything Cost?
The total cost of building the van was approximately €3500, including all materials.
Final Outcome
When the van was finally completed, we were really happy with how it turned out and that we were able to build it ourselves. It took about 5 months to build the van. We started off slowly, but as spring approached and with summer vacation days ahead, we picked up the pace towards the end.
We've made some minor adjustments since then, as we've noticed some things that needed to be done better, and we've also added some more decoration to the van.
This was definitely the most interesting and rewarding project we've ever done! If you have the interest, time, and desire to build your own personalized adventure vehicle, we highly recommend starting the project. The van has brought us many interesting encounters and adventures.